If you look around, you will find some of the fabulous fencings that many gardeners have put in place for their clients, and you think that it is no doubt a complicated job to do it. However, they put in effort and work with passion in order to bring out the best results for the clients.
As we know that wooden fences not only provide you privacy or separation from the property from next door, but they are incredible design elements for your garden or patio.
If you are planning to go for a DIY project of your own wooden garden fence or in between creating your own dream garden, then you are at the right place. Keep going on with this blog, and you will get to know about the tips that will be helpful for you.
Planning For The Project:
Going for a project of building your own wooden fence is one good way to bring out the best craftsmanship and pull off your own ideas in your garden or on the patio.
While there’s no limit on how creative you can be with the wooden garden fence, you still need to make sure that you are meeting all the requirements for the fencing. It’s always important to know first what purpose your garden fence will have.
Are you looking to build a boundary between flower beds or thinking of separating your garden from next door? Or are you trying to achieve a wooden screen to provide maximum privacy in the garden? Like always, the materials you need for the project you have planned.
Picking Up The Materials:
If you are planning to build your own DIY garden fence from wood, then there’s a whole variety of options that are available for you. For instance, you can work with natural materials such as branches, sticks or even recycled pallets that are available in the market.
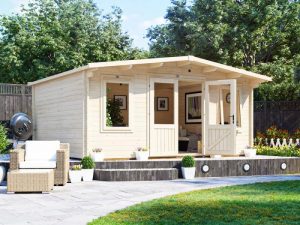
You can also use new materials if you are building a fence from wood, and there are chances that you will find a mixture of materials too. Modern-day fences are often made from aluminium, but wooden elements can also be added to them. Speaking of fences, you can check the wooden garden fence from Your Extra Space.
Picking up between ready-made components or going for materials where you need to cut and finish every component yourself from the start depends on your abilities. Also, it depends on how much budget you have for this project.
Meanwhile, ready-made components make it easier, but they put a limit on your creativity. If you are aiming for a DIY project from scratch, it will make you face some challenges but gives you plenty of scope for creativity and a bespoke design that you can do on your own.
What Type Of Fence Are You Building?
Wooden fencing isn’t only about how it functions, but how it looks also plays a crucial role. Fencing is always a design tool for your house, garden, patio, pool, or balcony.
If you are opting for slats or natural wood for low or high fences, it can really give an outstanding look to your home. You can always pick a different type of fencing for the right garden design. Read about the most popular garden fences below:
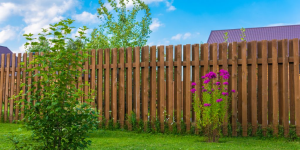
Slat fence:
Slat fences are simple wooden fences that are made up of metal or plastic elements. They are horizontally placed to provide privacy and wind protection.
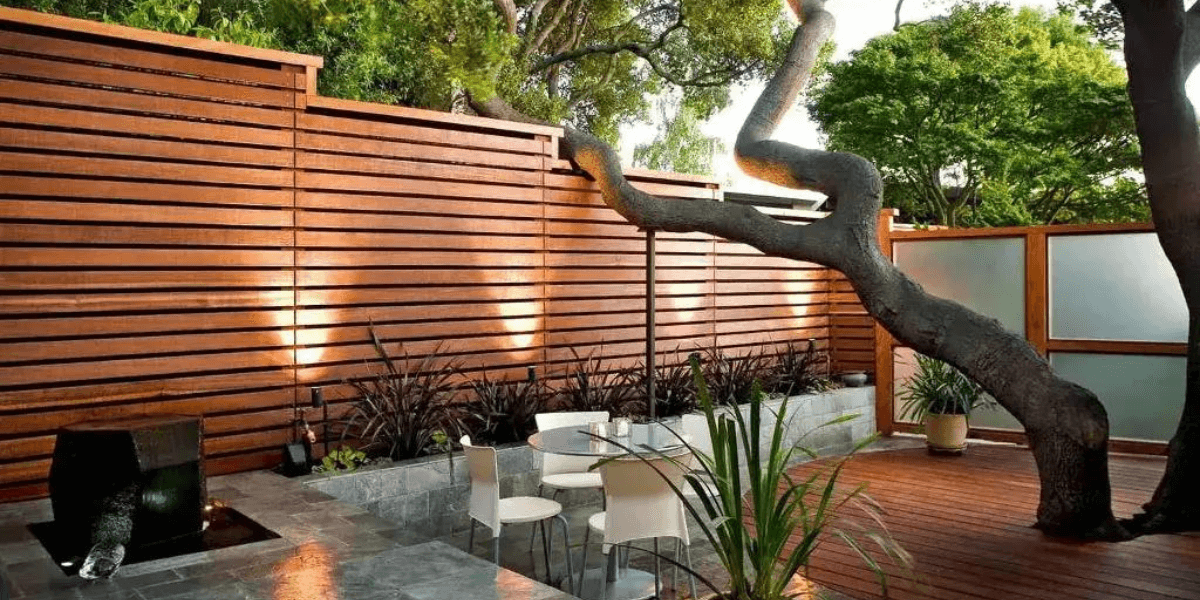
Panel fence:
Panel fences provide you maximum privacy, and they are placed vertically but can be arranged in a horizontal manner.
Lattice-Style/Hunter’s Fence:
Hunter’s fence is one of the classic fences that is used widely across the world. It gives a rustic look to your garden without obstructing the view. This type of fencing is half-rounded with cross-connected components and used in conjunction with hedges or other plants.
Building The Fence:
Read about the steps that you have to follow to build the fence:
- Starting With The Fences: Firstly, if you are going to build the fence. You need to lay out the fences. Use a string line and batter boards for outlining the perimeter of the fence. Mark the fence post positions by spacing them six to eight feet with the fence line using spray paint.
- Digging The Holes: Use a shovel or post-hole digger to dig the holes as per your post size and code. Post hole diameters need to be approximately three times the width of the post.
- Setting Up Posts: Set up posts by pouring 3 to 4 inches of gravel into the post holes and tamp or pack the gravel with the end of the post. Set the post in the middle of the hole and add dry concrete mix within six inches of ground level.
- Attaching The Rails Or Panels: Secure each rail or panel to the posts using deck screws or nails, as well as use fasteners per post. Use a line level to ensure each rail is straight. If you are using rails, a level will help in setting the first picket. Once you are done with this, you can use a spacer block that will help the rest of the pickets.
- Capping Each Post: Attach post caps on every post with a rubber mallet to make sure that they fit securely on the post.
- Staining And Treating The Fence: If you have picked wooden fences, you have to use a wood preservative in order to prevent the wood from rotting. Adding 2 coats for more absorbent end grain. Also, there are many garden fence paint ideas that you can pull off on your own. Browse through the internet for these ideas.
Important tips that you need to note down:
- Check for codes and permits. Get in touch with the local homeowner’s association to determine if you need to meet any building codes or obtain building permits before you go for your DIY fence project. There might be codes for your town or city that has a list of guidelines.
- Before starting the project, determine the exact location of your property lines. You need to obtain a map that will show you the property lines and boundaries.
Final Thoughts:
Thinking of building your own wooden garden fence? Make sure that you are following these tips and tricks to get your task done. You can write down the items that are required. Equipment, nails, screws, paint, and wood stain, to name a few. Once you have gathered every component and equipment, then it’s time to kickstart your project.